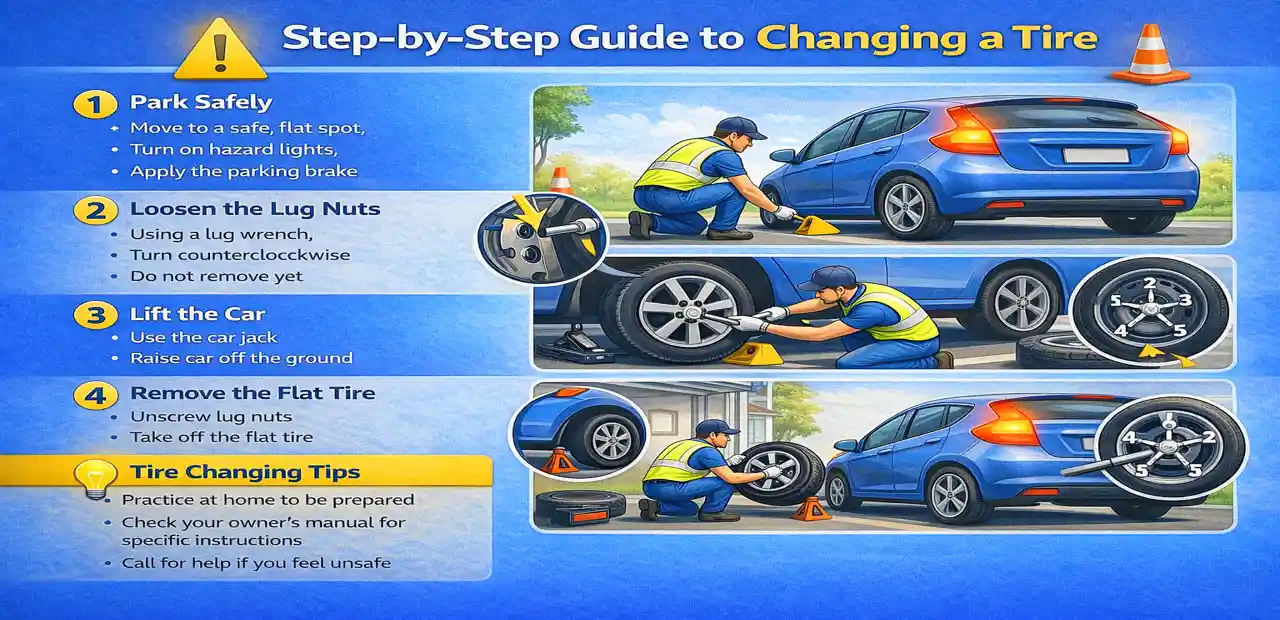
1. Park Safely
The first and most important step is to ensure you’re in a safe place. If you’re driving on the highway or any busy road, pull over to the side as far as possible. Try to park on a flat surface, away from traffic. If you’re on an incline, make sure the car is on a stable area to avoid any movement.
Once you’re safely off the road:
- Turn on your hazard lights to alert other drivers.
- Engage the parking brake to keep your car from rolling while you’re working.
- Place wheel chocks (or any heavy objects) behind the tires that remain on the ground. This will help prevent the car from moving.
Ensuring a safe environment is essential before you begin working on your tire.
2. Loosen the Lug Nuts
Now that you’re parked securely, it’s time to start loosening the lug nuts. The lug nuts are the bolts that hold the tire in place. Use a lug wrench to turn each nut counterclockwise. Do not remove them yet, just loosen them enough so you can easily remove them once the car is lifted.
It’s easier to do this while the car is still on the ground, as the weight of the vehicle keeps the tire from spinning. If the lug nuts are too tight, use your body weight to help loosen them.
3. Lift the Car
After the lug nuts are loosened, it’s time to raise the car. Position your car jack under the car at the jacking point, which is usually indicated in your car’s manual. The jacking point is typically near the flat tire.
Once you have the jack in place, slowly begin lifting the car. Keep lifting it until the flat tire is completely off the ground and there’s enough space for you to remove the tire. Always ensure that the car is stable once lifted.
If you have a jack stand, you can use it to further secure the car while you work.
4. Remove the Flat Tire
Now that the car is lifted, it’s time to remove the flat tire. Use the lug wrench to unscrew and completely remove the loosened lug nuts. Set them aside somewhere safe so you don’t lose them. Once the lug nuts are off, carefully pull the flat tire off the wheel hub.
Be cautious when handling the flat tire, as it can be heavy, especially if the car is a larger model. Place the flat tire out of the way for later disposal or repair.
5. Install the Spare Tire
Next, take your spare tire and align it with the wheel hub. Carefully slide the tire onto the hub, making sure the holes in the tire line up with the bolts. Once the tire is in place, hand-tighten the lug nuts onto the bolts. Do this in a star pattern—tightening one nut, then moving across to the opposite side. This ensures even pressure on the tire.
It’s important not to tighten the lug nuts completely yet—just get them on enough to hold the tire in place.
6. Lower the Car and Tighten the Lug Nuts
Once the spare tire is in position, it’s time to lower the car back to the ground. Use the car jack to slowly lower the car until the spare tire is fully supporting the weight of the vehicle. Once the car is back on the ground, remove the jack and jack stands if used.
Now, it’s time to tighten the lug nuts securely. Use the lug wrench to tighten the nuts in a star pattern, just like before. This helps make sure the tire is properly secured and evenly tightened. Be sure to apply enough force so that the nuts are firmly in place.
Final Check and Clean Up
Before you finish, double-check that all the lug nuts are fully tightened and secure. Give the spare tire one last inspection to make sure it’s aligned properly.
Finally, gather all your tools, including the flat tire. If the tire is repairable, take it to a tire shop for fixing. Otherwise, be sure to dispose of it properly.
Drive Carefully
Once you’ve finished, take the car for a short drive to ensure everything is working correctly. If you’ve installed a temporary spare tire, remember that it’s designed for short-term use only, so replace it with a full-sized tire as soon as possible.