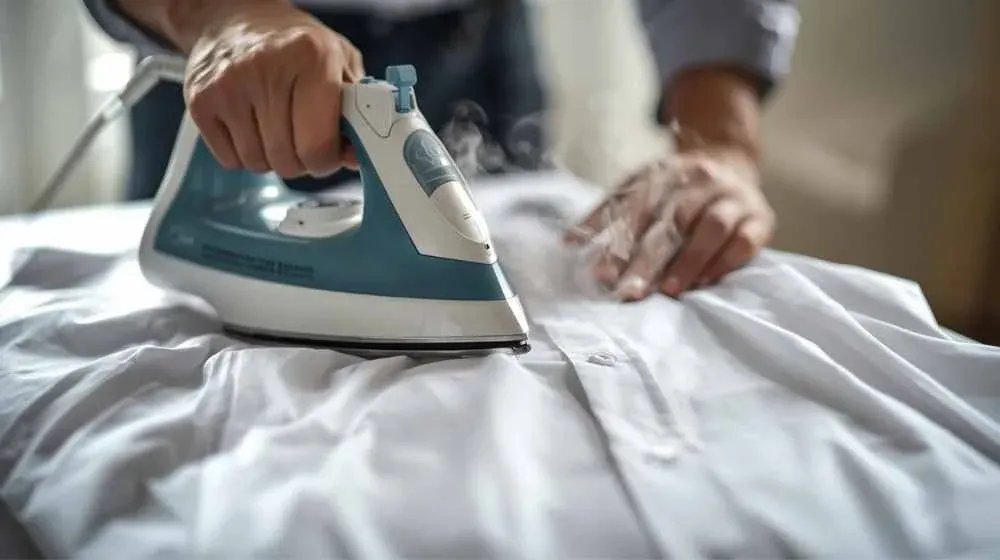
Ironing a shirt is one of the most essential yet simple tasks when it comes to looking your best. Whether you’re heading to work, a job interview, or just want to look sharp, knowing how to iron a shirt properly can make a huge difference in how you appear. A well-ironed shirt gives off a polished, professional image and shows that you take care of the small details, boosting your overall presentation.
In this comprehensive guide, we’ll cover everything you need to know to iron a shirt like a pro, from setting up your ironing space to ironing various parts of the shirt for the perfect finish. Plus, we’ll discuss how ironing a shirt can influence your personality and impact the way others perceive you. Let’s dive in!
Why is Ironing a Shirt Important?
Ironing a shirt goes beyond just looking good. A wrinkle-free shirt sends a strong message to others, whether at work or in social situations. It shows attention to detail, discipline, and an overall polished approach to life. Here are the key reasons why ironing your shirt is important:
- Professional Appearance: A well-ironed shirt communicates that you are serious about your appearance and professional in your approach.
- Confidence Booster: When you wear a shirt that looks sharp, you feel more confident and ready to take on challenges.
- Longer Shirt Life: Regular ironing can help maintain the fabric’s quality, preventing wrinkles and creases from setting into the fibers, which extends the life of your shirts.
- Improved Personality: Looking neat and well-maintained can leave a positive impression on others and boost your personal and professional relationships.
What You Need to Iron a Shirt
Before you begin, gather the necessary items for an efficient and successful ironing session:
- Iron: A steam iron works best for removing stubborn wrinkles.
- Ironing Board: This provides a flat surface for ironing your shirt.
- Water: For steam to help remove wrinkles.
- Shirt: Preferably slightly damp, as it’s easier to iron.
- Hanger: To hang the shirt after ironing, preventing new wrinkles from forming.
How Ironing a Shirt Affects Your Personality
Ironing a shirt does more than just improve your appearance—it also helps shape your personal image and boosts your confidence. When you wear a well-ironed shirt, you automatically feel more put-together. People are more likely to perceive you as organized, detail-oriented, and someone who takes pride in their personal presentation. In both professional and personal settings, this impression can work in your favor by increasing trust, respect, and even career opportunities.
Step-by-Step Guide to Ironing a Shirt
Follow this easy-to-understand, step-by-step process to iron your shirt like a pro.
Step 1: Set Up Your Ironing Area
First, prepare your ironing board. Set it up in a comfortable and spacious area. Ensure the board is at a height that doesn’t cause strain on your back. Plug in the iron and adjust its temperature according to the fabric of your shirt. Most shirts are made of cotton, polyester, or a mix of both. Be sure to follow the fabric care label for specific temperature guidelines.
For a smooth ironing experience, ensure that your iron has enough water for steam if you’re using that function. Steam helps in removing stubborn wrinkles.
Step 2: Prepare the Shirt
It’s much easier to iron a shirt when it’s slightly damp. If your shirt is dry, use a spray bottle to mist it with a little water. Alternatively, you can use your steam iron to dampen it while you begin ironing. Damp fabric responds better to the iron’s heat, making the process quicker and more effective.
Step 3: Start with the Collar
The collar is one of the most visible parts of the shirt, so it’s essential to make it crisp. Lay the collar flat on the ironing board, ensuring that the back of the collar faces up. Start ironing one side of the collar and flip it over to iron the other side. Iron from the outer edges toward the center to prevent new wrinkles.
For an even sharper look, press harder on the collar with the iron. If you’re aiming for extra sharpness, you can use a higher heat setting on the collar, as it’s a small section of the shirt.
Step 4: Iron the Cuffs
After the collar, move on to the cuffs. Unbutton them and lay them flat on the board. Start with one side of the cuff and work your way around. Then flip the cuff to iron the other side. Remember, always iron from the edges inward. This technique helps to avoid creating new wrinkles or creases.
For shirts with French cuffs, iron both the inside and outside of the cuffs carefully, as this style of cuff requires extra attention to detail.
Step 5: Iron the Sleeves
Ironing the sleeves requires precision to avoid creating new creases. Lay the sleeve flat on the ironing board, ensuring that the seams are aligned. Start at the top near the shoulder and slowly work your way down to the cuff. Iron both the inside and outside of the sleeves. Be careful to avoid creating unwanted wrinkles as you move along the sleeve.
If your shirt has crease lines along the sleeves, follow them to maintain that sharp, structured look. For non-crease shirts, avoid pressing too hard to avoid adding any permanent creases.
Step 6: Iron the Back of the Shirt
Now, it’s time to move on to the back of the shirt. Lay it flat on the ironing board, with the back facing up. Start at the top near the shoulder area and iron down toward the hem of the shirt. You may need to adjust the shirt on the board to get every section smooth. Use steam to tackle any stubborn wrinkles.
If your shirt has pleats, gently iron them by following their natural lines. Be careful not to flatten the pleats too much, as they give the shirt its crisp structure.
Step 7: Iron the Front of the Shirt
Now that the sleeves, cuffs, and back are ironed, it’s time to focus on the front of the shirt. Start with the side of the shirt that doesn’t have buttons. Iron from the shoulder down to the hem. When you get to the button area, avoid pressing directly over the buttons. Instead, work around the buttons by gently pressing the fabric. This prevents damaging the buttons or leaving unwanted marks on the fabric.
Step 8: Hang the Shirt Immediately
Once you’ve finished ironing, hang the shirt on a hanger immediately to prevent wrinkles from forming again. Let the shirt cool for a few minutes while it hangs. The fabric will settle into its shape, and you’ll maintain a sharp look.
Tips for Ironing a Shirt Like a Pro
- Use Steam: A steam iron makes ironing faster and easier. It softens the fabric, helping to remove wrinkles without much effort.
- Iron in Sections: Instead of trying to iron the whole shirt at once, focus on one area at a time. This will ensure every section is wrinkle-free.
- Iron While Slightly Damp: A damp shirt is easier to iron, and steam will help in removing wrinkles more effectively.
- Use a Pressing Cloth for Delicate Fabrics: If you’re ironing delicate fabrics like silk or wool, always use a pressing cloth to avoid burning or damaging the fabric.
- Avoid Overheating the Iron: Always check the care label to ensure you are using the correct temperature for the shirt’s fabric. Too much heat can burn or damage the fabric.
How Ironing a Shirt Enhances Your Personality
Ironing a shirt is more than just a practical skill—it can boost your self-confidence and shape the way others perceive you. When you wear a well-ironed shirt, you look and feel more professional, organized, and detail-oriented. Ironing shows that you take pride in your appearance, which is a key component of a positive personality. People are more likely to respect you and take you seriously when they see that you care about the little things, like a well-maintained, crisp shirt.
Conclusion
Learning how to iron a shirt is a valuable skill that can help you maintain a polished appearance. A well-ironed shirt not only improves your look but also enhances your personality by boosting your confidence and presenting you as someone who pays attention to detail. By following the steps outlined above, you’ll be able to iron your shirts quickly and effectively, ensuring that you always look your best.
Remember, ironing doesn’t have to be a time-consuming chore. With practice, you’ll be able to iron shirts in no time and enjoy the benefits of looking sharp, polished, and professional every day.
READ THIS ALSO: How to Fix a Squeaky Door